While the default option on a Macbook is to transfer photos to the Library Folder within the Photos App, it is also possible to Transfer Photos from Digital Camera to any Folder on your Mac.
In order to transfer Photos to a specific Folder on Mac, the first step is to create a Folder within Photos App and also create an Album within that Folder.
Once this is done, you should find the Photos App automatically providing you with the option to Transfer Photos from Digital Camera to the Folder that you created in the Photos App.
Transfer Photos from Digital Camera to Folder on Mac
Now that you know the requirements to transfer photos from digital camera to a Folder on Mac, let us go ahead and take a look at the steps to create New Folder within Photos App and transfer Photos from Digital Camera to this Folder on your Mac.
Step 1. Create New Folder/Album in Photos App on Mac
Follow the steps below to create a Folder containing an Album within the Photos App.
1. Open the Photos App on your Mac.
2. Hoover mouse over My Albums and click on + icon located next to My Albums and select Folder option in the menu that appears.
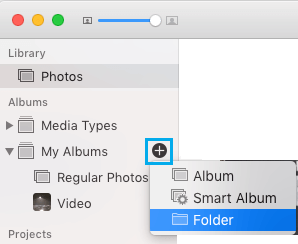
3. Once the Folder is created, type a descriptive Name for the New Folder.
4. Next, click on the + icon located next to the New Folder that you just created and click on Album.
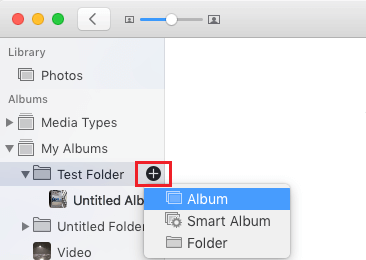
5. Once the Album is created, type a Name for the New Album.
Step 2. Transfer Photos from Digital Camera to Folder On Mac
Once a New Folder is available within Photos App, it will become available for selection in “Import” section of the Photos App on your Mac.
1. Open the Photos App on your Mac and connect the Digital Camera to Mac.
2. Click on Digital Camera as it appears in the left-pane. In the right-pane, select Photos that you want to transfer by clicking on them.
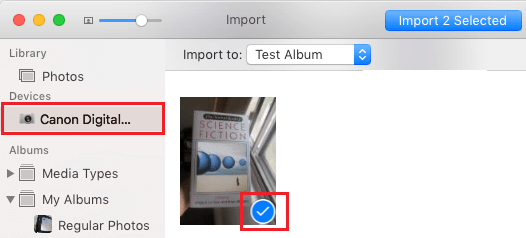
3. After selecting Photos, click on the Down Arrow next to “Import to:” and select the Folder into which you want to import the selected photos.
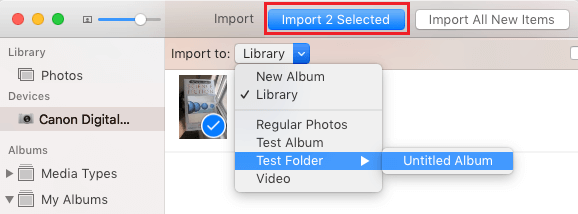
4. Make sure that the selected Folder name appears in “Import to” entry and click on Import Selected button.
All the selected Photos will be imported directly into the Folder that you had selected in “Import to” field.
Tip: To Select all Photos, click on the first Photo, press shift key, scroll down and click on the last Photo.
Import Photos from Digital Camera to New Album on Mac
If you did not create a New Folder and Album before transferring Photos, the Photos App provides the option to transfer Photos to a New Album within Photos App.
1. Open Photos App on your Mac and connect the Digital Camera to Mac.
2. Click on Digital Camera as it appears in the left-pane. In the right-pane, select Photos that you want to transfer by clicking on them.
3. Once the Photos are selected, click on the Down Arrow next to “Import to” and select New Album option.
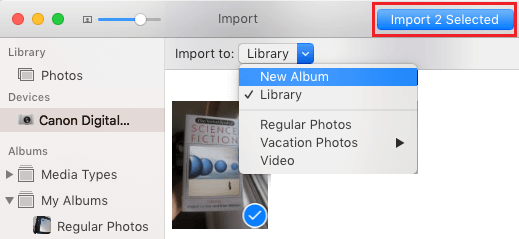
4. When prompted, type a Name for the New Album and click on OK.
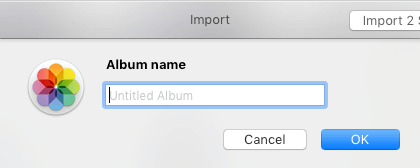
5. Finally, make sure that newly created Album appears in “Import to” field and click on Import Selected button
The selected Photos will be imported directly into the New Album that you had just created.