Many people routinely store photos and videos on their computers, phones and some do not even make a backup of Photos to an External Storage device or a USB drive. Hence, let us take a look at how to store Photos in Cloud.

Why Store Photos in Cloud?
As you must have already experienced, storing Photos on computers and phones can be risky. Whether you have a Windows PC or Mac, these machines can breakdown at any time, locking you out of all your Photos and Videos.
If the hard drive on a PC or Mac gets corrupt or fails, it may not even be possible to recover your Photos and videos.
Just like computers, your iPhone or Android Phone can fail, get lost or stolen. If this happens, you may end up losing all your memories.
Hence, it is important that you make a backup of all your Photos and Videos to an External Storage Device and also get used to storing Photos in the Cloud.
Advantages of Storing Photos in Cloud
Apart from being more reliable than even the best external storage devices, storing Photos in Cloud offers other benefits.
- You can access your Photos at anytime from anywhere in the world
- Most Cloud storage services make it easy to Share Photos
- Cloud Storage services do not cost much
So let us go ahead and take a look at different options that are available to store photos in Cloud.
1. Store Photos From iPhone to iCloud
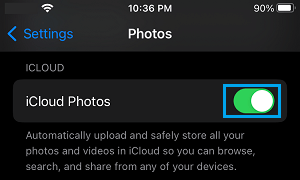
If you are using iPhone, you can setup your device to automatically transfer Photos to Apple’s iCloud storage service by enabling iCloud Photos on your iPhone.
1. Open Settings > scroll down and tap on Photos.
2. On the next screen, move the Slider next to iCloud Photos to ON position.

Apple provides 5 GB of iCloud storage space for all iPhone users. However, this won’t be enough for storing all your Photos and Videos on iCloud.
If you are serious about storing Photos on iCloud, you can buy additional iCloud Storage space from Apple at very affordable rates.
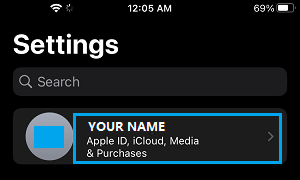
1. Open Settings > tap on your Apple ID Name.

2. From the next screen, go to iCloud > scroll down and tap on Upgrade to iCloud+.
3. Follow the on-screen instructions to complete the upgrade process.
2. Store Photos From Android Phone to Google Photos
Similarly, if you are using an Android Phone or Tablet, you can setup your Android device to automatically transfer and store Photos on Google’s Cloud Storage service.
1. Open the Photos App on your Android Phone.
2. Tap on 3-line icon (top-left corner) > select Settings in the drop-down menu.
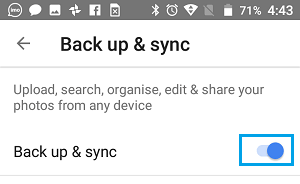
3. From the Settings screen, go to Backup & Sync > Enable Back up & Sync option.

After this, all the Photos that you take on your Android Phone will be automatically backed up to Google Photos.
Google provides 15 GB of free Cloud Storage service for all Google Account users and provides additional Cloud storage at very reasonable rates.
1. Open the Photos App > Tap on the 3-line icon > select Settings in the drop-down menu.
2. From the Settings screen, go to Backup & Sync > tap on Buy More Storage option.
On the next screen, choose your storage plan and pay using PayPal, Credit Card or a Gift Card.
3. Store Photos From Digital Cameras to Cloud
The procedure to store photos from digital camera to Cloud will depend on the Cloud Storage service that you are using and whether you prefer using a Mac or PC.
If you are using Mac, the Photos app on your Mac allows you to import photos into your iCloud Photo Library.
Similarly, the OneDrive App on your Windows PC can automatically upload images that you place in the Camera Roll Folder to OneDrive.
If your prefer using Google’s Cloud storage service, you can simply drop Photos from your digital camera into a Cloud Synced Folder and all your Photos will be transferred to Google Drive.
In this regard, you can refer to this article: How to Sync Specific Folder On Computer With Google Drive