While the default Setting on a Windows Laptop is to go into sleep mode when the Lid is closed, it can be configured not to go in sleep mode, even when the Lid is closed.
In general, the most common reason for users looking for a way to stop the Laptop from going to sleep when the Lid is closed is to avoid the possibility of the Laptop in sleep mode being placed in its case.
When a Laptop in sleep mode is placed in its case, there is always the possibility of the Laptop being damaged due to build-up of heat, which can occur due to the Laptop still being active and producing heat.
Prevent Laptop from Going to Sleep When Lid Closed
Follow the steps below, to stop Laptop from going into sleep mode when the lid is closed.
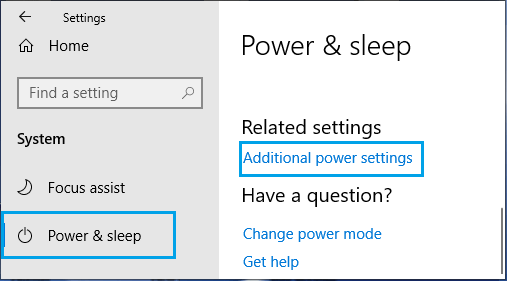
1. Go to Settings > System.
2. Click on Power & Sleep option in the left pane. In the right-pane, scroll down and click on Additional Power Settings link, located under ‘Related Settings’ section.

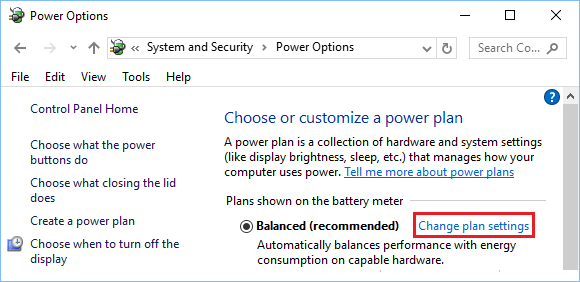
3. On Power Options screen, click on Change Plan Settings link, located next to the current Power plan on your computer.

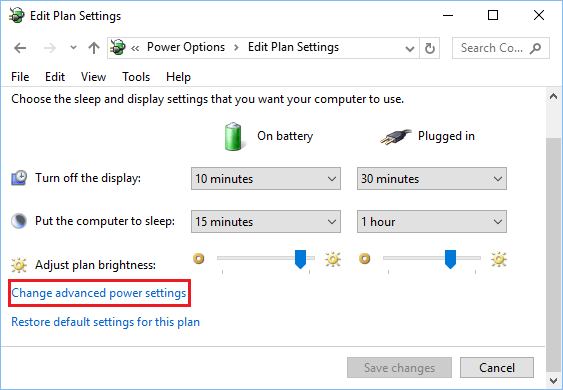
4. On Edit Plan Settings screen, click on Change Advanced Power Settings Link in the left pane.

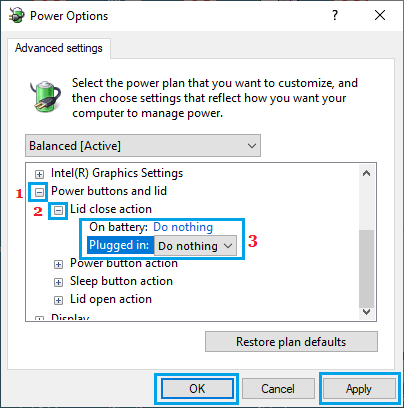
5. On the next screen, expand Power buttons & lid entry > expand Lid close action and select Do nothing option for battery and Plugged in.

6. Click on Apply and OK to save these settings on your Laptop.
After this, your computer will no longer go into sleep mode when you close the Lid. If you prefer, the laptop can remain open, even if the Lid is closed.