Gmail has a better search feature compared to most other Email services, which also provides multiple ways to Filter and Sort Email messages.
This ability to Filter and Sort Email Messages in Gmail can be useful, considering the fact that a typical Inbox in Gmail is likely to contains all kinds of Email Messages, which are only arranged by the date on which they were received.
Sort Gmail By Sender Name or Email Address
In general, you can use the following search criteria to Sort Gmail by Sender name or Email Address.
- Sort Gmail Using Search
- Sort Gmail By Hovering Mouse Over Sender Name
- Sort Gmail Using Filters
1. Sort Gmail Using Search Function
The search function in Gmail is suitable for quickly finding emails, based on sender name or email address.
1. Using PC or Mac, login to your Gmail Account.
2. Type from: Name (or email address) into the search bar and click on the Search button.

This will immediately list all the emails received from and sent to this particular contact of yours.
2. Sort Gmail By Hovering Mouse Over Sender Name
Another quick way to sort Gmail by sender name is to hover mouse over the sender name and click on Email option in the pop-up.
1. Login to your Gmail Account.
2. In the inbox, hover your mouse over the Name of the sender whose messages you want to sort and click on Emails in the pop-up.
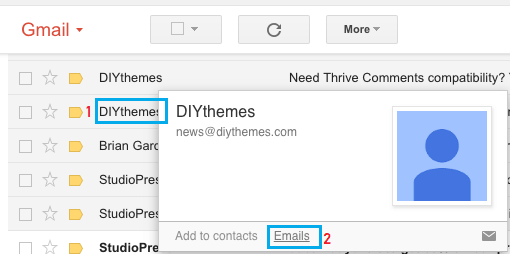
Gmail will immediately list all the emails received from and sent to this particular sender.
3. Sort Gmail Using Filters
Using Labels and Filters can be defined as a permanent way of segregating and sorting Gmail messages. This method allows you sort Gmail based on sender name, email address, date and other criteria.
1. Login to your Gmail Account.
2. Click on Search Options icon located at right end of the search bar to bring up Gmail Search Form.
![]()
3. In the Gmail Search Form, type the Name or Email address of the sender in the “From:” field and click on Create Filter with this search option.
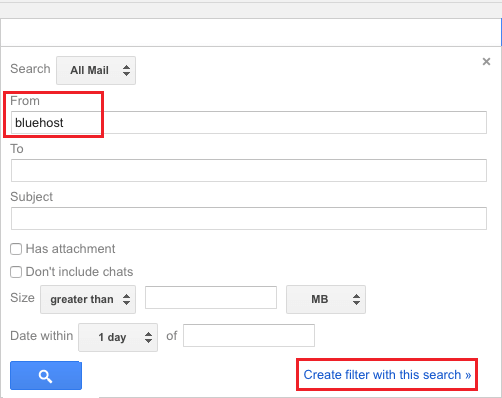
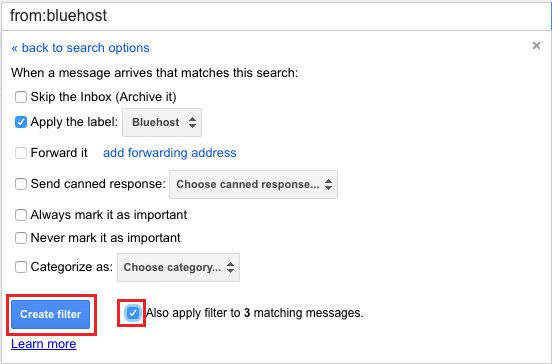
4. On the next screen, select Apply the Label option, click on Choose Label and select New Label option in the drop-down.
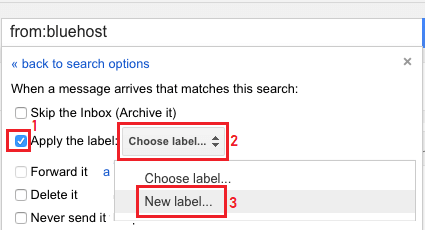
5. In the pop-up, type a Name for the New Label and click on Create.
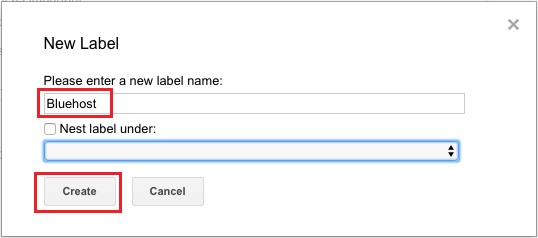
6. Once the Label is created, select Apply filter to matching messages option and click on Create Filter button.
7. The New Label that you just created will appear in the side menu under Categories.
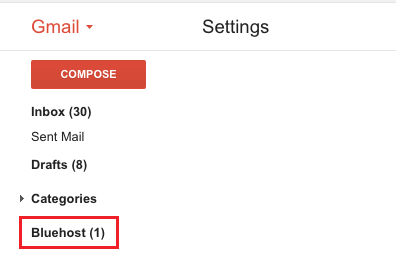
Click on the New Label and you will be able to see all the messages from this particular contact of yours.