If you use public WiFi networks, it is generally recommended that you use a VPN service to protect your privacy. You can find below the steps to Setup and Use VPN on Android Phone or Tablet.
Use VPN on Android Phone or Tablet
The easiest way to setup and use VPN on Android Phone or tablet is to download Free or Paid VPN Apps as available on Google Play Store.
All that is required to setup VPN on your Android device using these apps is to download the App and follow the onscreen instructions.
However, if your VPN Service does not provide an App and you are interested in having more control over VPN Network, you will have to go for a Manual VPN Setup.
You will find below the steps to Manually Setup VPN on Android Phone and also the steps to Setup VPN using VPN Apps.
1. Setup VPN Using Turbo VPN App
One of the best free VPN Apps that you can find on Google Play Store is Turbo VPN, which offers unlimited Free VPN service.
Although, Turbo VPN App covers only a limited number of Countries, it covers the most popular Countries that most users would be interested in.
1. Open Google Play Store on your Android Phone and download Turbo VPN App.
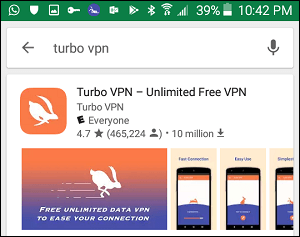
2. Once the App is downloaded, open the app and tap on the World icon located at the top-right corner.
![]()
3. On the next screen, select the Country in which you want to use Turbo VPN.
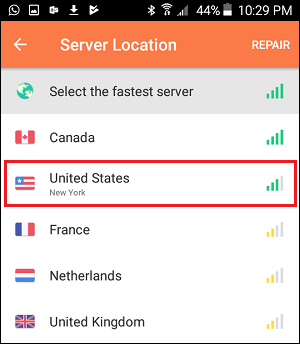
4. Wait for the App to connect to your selected Country’s VPN network. If you get an error message, select the Country again.
Once you are connected to the VPN network, you are all setup and ready to use the VPN service on your Android Phone.
2. Setup VPN on Android Phone Using TunnelBear App
TunnelBear VPN is another popular VPN App on Google Play Store.
TunnelBear provides a much bigger selection of Countries and allows you to try the App on free-trial basis, before making a decision to purchase the App.
1. Open Google Play Store and download TunnelBear VPN App on your Android Phone.
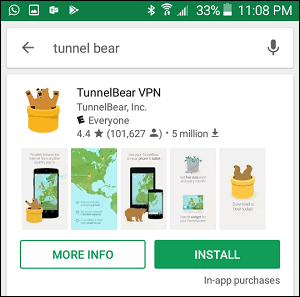
2. Once the App is downloaded, open the App > type your Email Address, Password and tap on Create a free account button.

3. The next step is to verify your Email Address by logging into your Email Account and acknowledging the Email received from TunnelBear.
4. After verifying your Email Address, open TunnelBear app and tap on the Continue button.

5. On the next screen, provide TunnelBear with permission to setup VPN connection on your Phone by moving the toggle to ON position.

6. On the conformation pop-up, tap on OK.
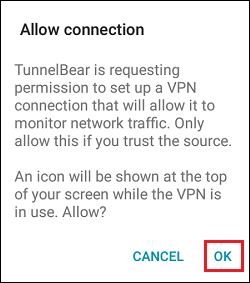
7. Once you tap on OK, TunnelBear App will connect to its VPN Network in the United States. You can change the location by tapping on the Up Arrow and select your desired Country from the list.

The free trail of TunnelBear VPN provides 500 MB, after which you can extend the free trial for 1 GB more by tweeting about TunnelBear, inviting a friend to TunnelBear or by installing TunnelBear on your computer.
If you like the service, you can go for Paid Plans, which start at an affordable $5 per month.
3. Manually Setup VPN on Android Phone
If you do not want to install VPN Apps, you can follow the steps below to manually setup VPN on your Android Phone or Tablet.
1. Open Settings on your Android Phone > tap on More Connection settings.
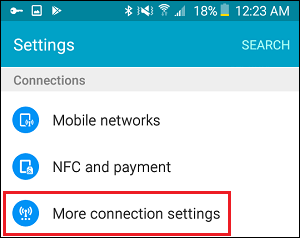
2. On Connection Settings screen, tap on VPN.
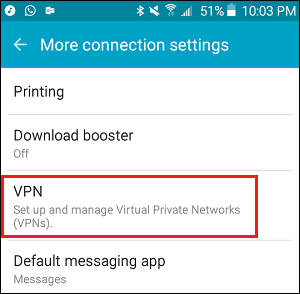
3. On the next screen, tap on the + button (or Add VPN).

4. On the pop-up, type any Name for your VPN Network, select VPN Type and type the IP Address of your VPN in “Server address” field and tap on Save.
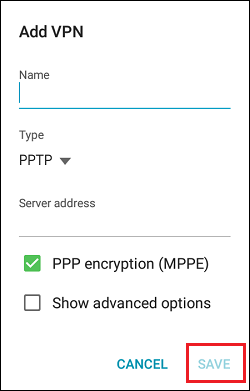
After this you will be able to browse the internet using VPN connection. You will be required to provide your User Name and Password, in order to connect to your VPN network.