You can send Group Email to multiple Contacts on iPhone by opening a New Message in the Gmail App and manually selecting the Contacts that you want to send the Email to.
However, manually adding Contacts to Email Message is time consuming and not suitable if you are frequently required to send Group Email Messages to a large Group of people.
In such cases, the most efficient way to send Group Email Messages is to create a Contact Group containing all recipients and address Group Email Messages to this Contact Group.
Send Group Email in Gmail App on iPhone
If you are sending a one-time Email Message to a small Group of people, you can send the Group Email Message by manually selecting the Recipients.
However, the most efficient way to send Group Emails on iPhone is by addressing the Email Message to a Contact Group containing all the recipients that you want to send the Email to.
1. Send Group Email to Individual Contacts Using Gmail App on iPhone
You can find below the steps to send a one-time Group Email on iPhone by manually selecting the Recipients.
1. Open the Gmail App on your iPhone > tap on the New Message Icon in the bottom menu.
![]()
2. On the New Message screen, tap on the + Icon located at top-right corner and this will take you to your Contacts List.
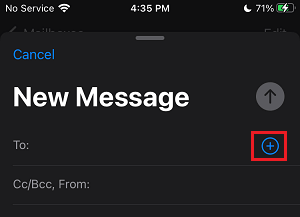
3. On the Contacts screen, select the Contacts that you want to send the Email to by tapping on them.
4. Once the Contacts are added, type your Email Message and tap on the Send option to send the Group Email Message to the selected Contacts.
2. Send Group Email to Contact Group on iPhone Using Gmail App
As mentioned above, the most efficient way to manage the task of frequently sending Group Email Messages is to add recipients to a Contact Group and address your Email Messages to this Contact Group.
Since, the Gmail App on iPhone lacks the ability to create Contact Groups, we will be creating a New Contact with multiple Email Addresses, instead of creating a proper Contact Group.
Step 1: Create New Contact with Multiple Email Addresses
1. Open the Contacts App on your iPhone > tap on (+) icon located at top-right corner.
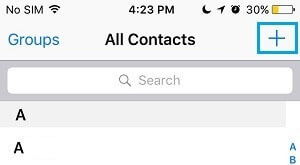
2. On New Contact screen, do not enter First or Last Name, instead enter the Group Name in the Company Field .
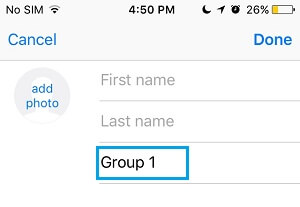
Note: We are naming this New Contact as Group 1, you can give it any other name that suits you better.
3. On the same screen, scroll down to Notes section and type Email addresses that you want to send the Group Email to.
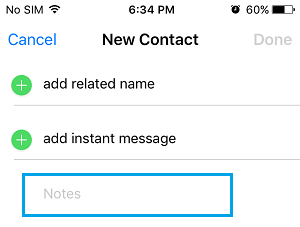
Note: The email addresses need to be written in a specific pattern (<email address1>, <email address2>). For example, <neel@techbout.com>, <sandy@techbout.com>, <john@techbout.com>
Once you are done typing all the Email addresses, tap and hold anywhere in the email addresses that you just entered and it will bring up a contextual editing menu.
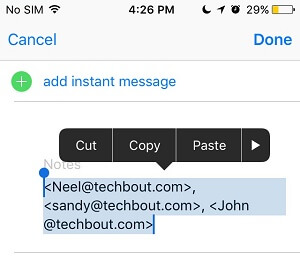
First, tap on Select All to select all the email addresses and then select the Copy option to copy the selected Email Addresses.
4. Scroll down on the same screen and tap on Add Email option.
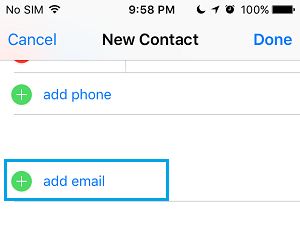
5. Next, tap and hold in the Email field and select the Paste option.
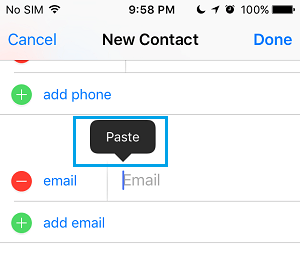
All the email addresses copied from the Notes section will be pasted in the email field of this new contact.
Step 2: Send Email to this New Contact with Multiple Email Addresses
Now that you have created a New Contact having multiple Email Addresses, you can simply address all your Group Emails to this New Contact.
1. Open the Contacts app on your iPhone and select the New Group Contact that you just created.
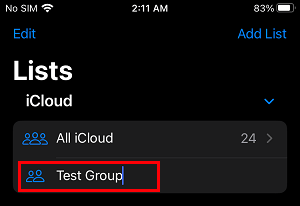
2. Tapping on the Contact Group (Group 1) will take you to the New Contact’s Profile page. Now, Tap on the email field.
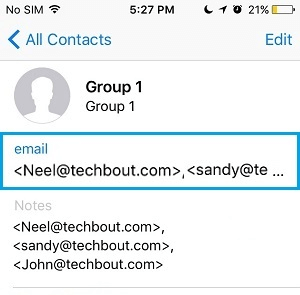
3. You will now be redirected to the Mail app – The ‘To:’ field will be filled with the email addresses of everyone in the Contact Group.
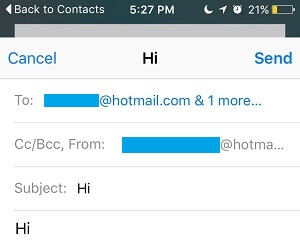
4. Type your Group Message and tap on the Send option to send the Email to this New Contact with multiple Email Addresses.
The Email will be sent to everyone listed in the Email Field of this New Contact (Group 1).
Why Copy Email Addresses from the Notes Field
In case you are wondering, the complicated step of typing email addresses in the Notes Filed and then Copying them and pasting in the Email field is required because the Email Field does not allow typing of special Characters.
In this case, the Email Field does not allow typing of the special characters (< and >) and these characters are required to enter multiple Email Addresses in the Email Field.