The “Printer is offline” error message in Windows operating system is designed to alert users about the Printer being switched OFF or not being connected to the computer.
However, the “Printer is offline” error is also known to occur even if the printer is properly connected to the computer and it is switched on.
While this type of error message is more commonly associated with network printers, it is also reported on local printers that are directly connected to the computer.
Printer is Offline Error In Windows 11/10
You can find below a number of methods to fix “Printer is offline” error and bring back the printer online on your Windows computer.
1. Check the Printer
As mentioned above, the simplest reason for a printer going offline is due to the paper tray being empty or paper getting stuck in the printer.
Hence, make sure there is enough paper in the paper tray and the printer panel is not indicating a paper jam error.
2. Power Cycle the Printer
Power cycling the printer can help in fixing software glitches and connectivity problems.
1. Power OFF the Printer > Unplug the Printer from its power supply source.
2. Wait for 60 seconds > plug the printer back to power supply source > Restart the Printer.
3. Check Printer Connection
If you are using a USB connected printer, make sure that the USB Port on your computer is working.
If it is not working, try another USB port and if this does not help refer to this guide: Fix: USB Ports Not Working Issue in Windows 10/11.
In case of a wireless printer, make sure the printer’s wireless option is switched on and the printer is connected to your Wi-Fi network.
4. Clear the Print Queue
A common reason for printer not working is due to a document being stuck in the print queue.
1. Type Printers in the search bar and click on Printers & Scanners in the search results.
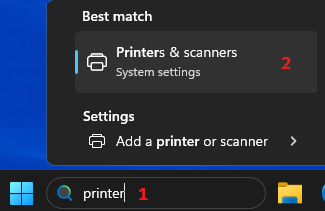
2. On Printers & scanners screen, click on the problamatic Printer. On the next screen, click on Open Print Queue.

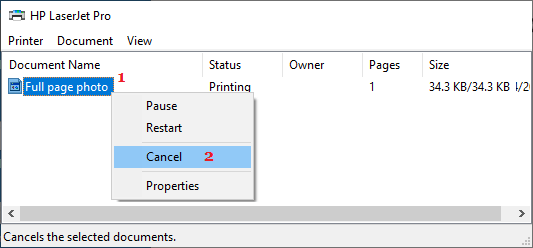
3. On the next screen, right-click on the Stuck Document (if any) and select the Cancel option in the right-click menu.
Once the stuck document is cleared, you should find the printer online and capable of handling print commands from the computer.
5. Make the Printer Online
Make sure the Printer is not stuck in offline mode.
1. Type Printers in the search bar and click on Printers & Scanners in the search results.
2. On Printers & scanners screen, select the Printer that you want to make online. On the next screen, click on Open print queue option.

3. On the next screen, open the Printer tab and click on Use Printer Offline to remove the check mark.
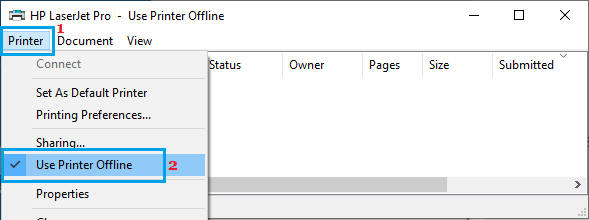
4. Wait for the printer to come back online.
6. Run Printer Troubleshooter
The built-in Troubleshooter in Windows 11/10 can be trusted to find and fix certain printing problems.
1. Go to Settings > System > Troubleshoot > click on other Troubleshooters.
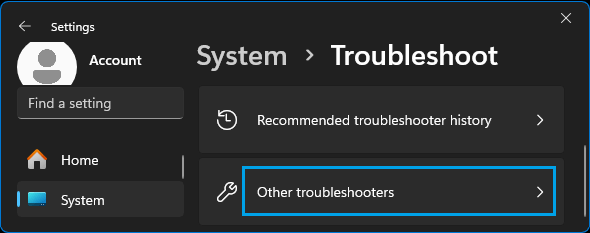
2. On the next screen, click on the Run button located in the Printer tab.

Follow the onscreen instructions as the troubleshooter tries to find and fix printing problems on your computer.
7. Restart Print Spooler Service
Sometimes, the problem is due to the Print Spooler getting stuck or not being set to autmatically start.
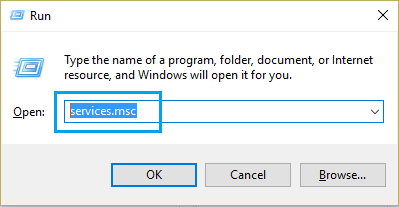
1. Right-click on the Start button and click on Run.
2. In the Run command window, type services.msc and click on OK.
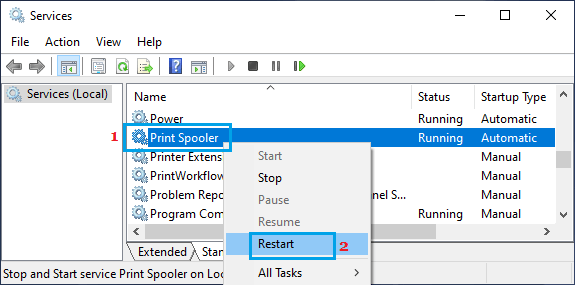
3. On the Services screen, right-click on Print Spooler and click on the Restart option.
Also, make sure that the Print Spooler service is set to start automatically. If it is not, double-click on Print Spooler entry and change startup type to Automatic on the next screen.
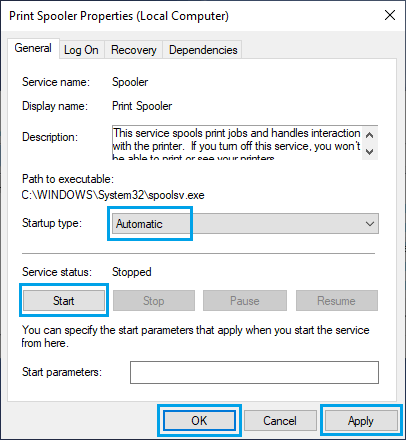
4. Click on Apply and OK to save this change on your computer.
8. Update Printer Driver
The problem could be due to the Printer driver on your computer being outdated.
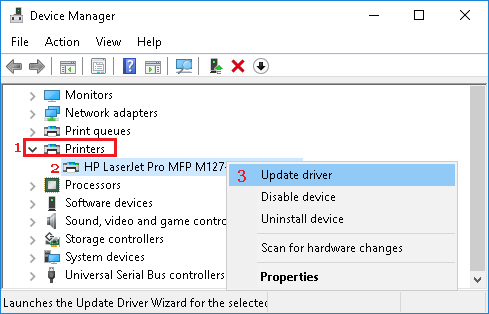
1. Right-click on the Start button and click on Device Manager.
2. On Device Manager screen, expand Printers entry, right-click on your Printer and click on Update Driver.
3. On the next screen, click on Search Automatically for updated driver software option.
4. Allow Windows to search for the updated printer driver and install it on your computer.
9. Set As Default Printer
If you usually use the same printer, making it as the Default Printer can help in avoiding printing problems in future.
1. Type Printers in the search bar and click on Printers & Scanners in the search results.
2. On Printers & scanners screen, click on the problamatic Printer.
3. On the next screen, click on More Device and Printer Settings.

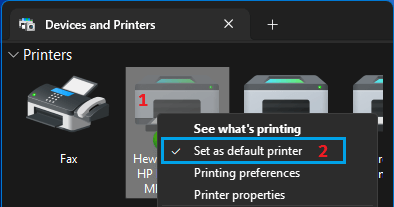
4. On the next screen, right-click on the Printer and select Set as default printer option.
10. Remove and Reinstall Printer
If above methods did not help, remove the printer and reinstall it back on your device.
1. Type Printers in the search bar and click on Printers & Scanners in the search results.
2. On Printers & scanners screen, click on the problamatic Printer.
3. On the next screen, click on More Device and Printer Settings.
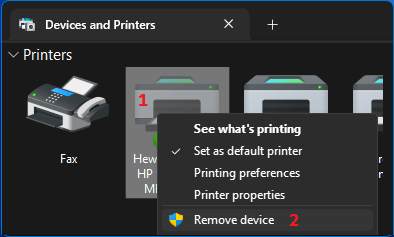
4. On the next screen, right-click on the Printer and select Remove device option.
5. After this, go to Settings > Bluetooth & Devices > Printers & Devices > click on Add Device button.
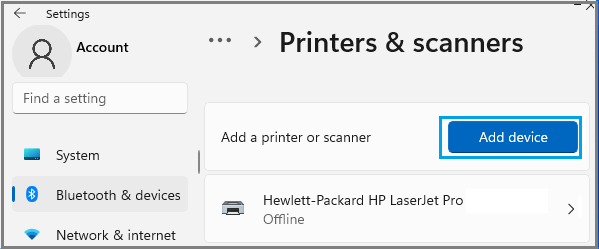
6. Select the printer as it is detected by the computer and follow the instructions to add the printer.
If the printer is not detected, you can refer to this guide: How to Add Printer in Windows 11/10.
