If you find that Printer is not available while printing documents on your computer, you will find below the steps to fix this problem in Windows 10.
Printer Not Available While Printing Documents
In a typical case, the user is trying to print a Word Document or PDF File and finds that the Printer attached to the computer is not available in the list of printers.
When the user opens the Control Panel, the Printer is either listed as Unspecified or not at all available on Printers & Devices Screen.
In most cases, this problem can be fixed by manually installing the Printer. If this does not help, you will have to go through other troubleshooting steps.
1. Add Local Printer in Windows 10
Make sure the Printer is connected to the computer, it is Switched ON and follow the steps below to Add the printer.
1. Open Settings on your computer and click on Devices.
2. On the next screen, click on Printers & Scanners in the left-pane. In the right-pane, click on Add a Printer or Scanner option.
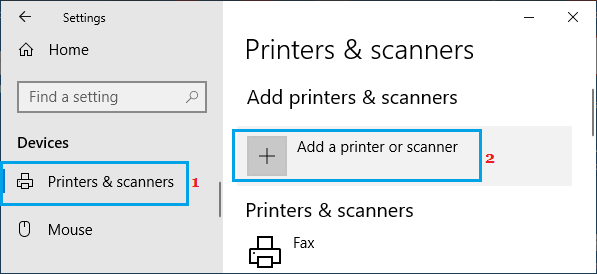
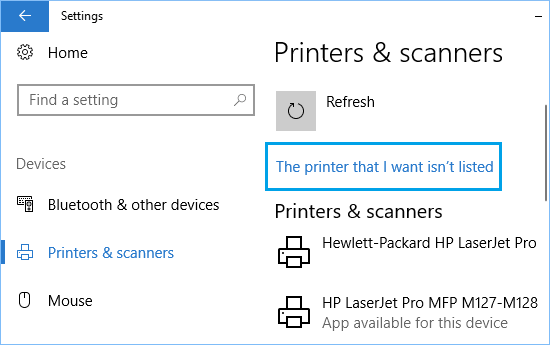
3. On the next screen, see if your computer is able to list your printer. If not, click on The printer that I want isn’t listed link.
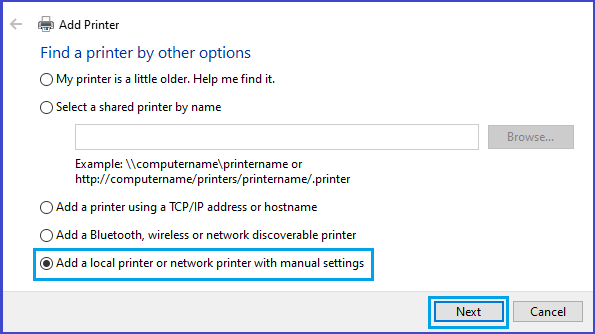
4. On the next screen, select Add a Local printer or network printer with manual settings and click Next.
5. On the next screen, select Use an existing port option > select the Port that you are currently using for the Printer and tap on Next.
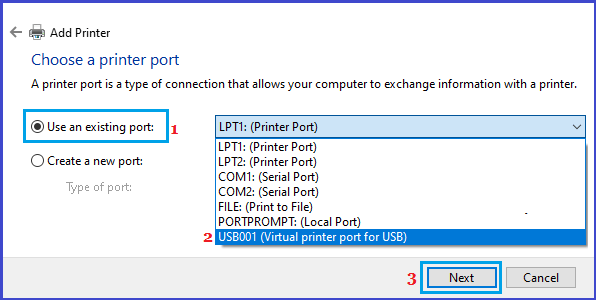
Note: If Printer is connected to computer with USB cable, select USB001 option. If you are using a parallel cable with Adapter, select LPT1 port.
6. On the next screen, select your Printer Manufacturer in the left pane. In the right-pane, select the Printer Model and click on Next.
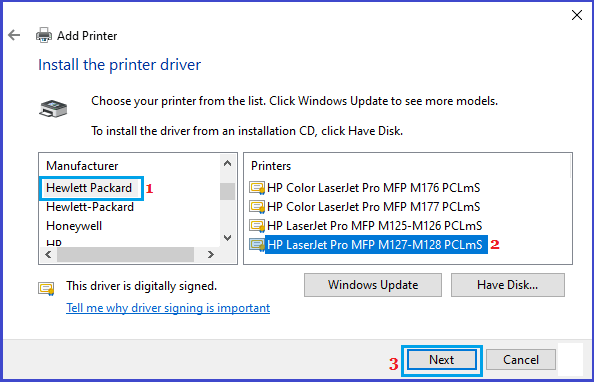
Note: If the exact Model of your Printer is not available, select the closest available driver.
If your printer Model or Manufacturer is not available, click on Windows Update button and wait for Windows to bring up all the available drivers.
You will have to be patient with this step, as it can take a long time for Windows to bring up the entire list of available printers.
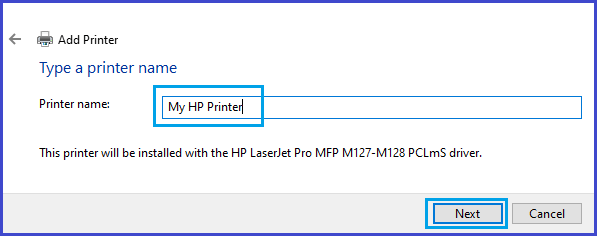
7. Type the Name for the Printer and click on Next.
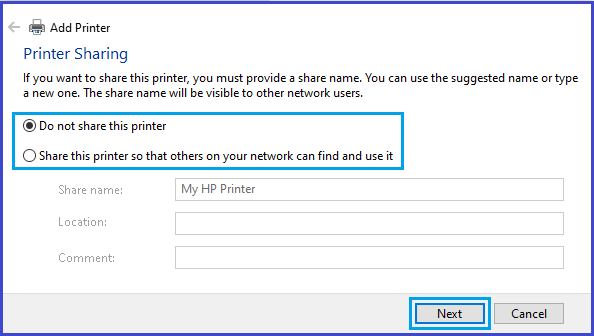
8. Select Do Not Share This Printer option and click on Next.
9. On the next screen, you can Print a test page and click on Finish.
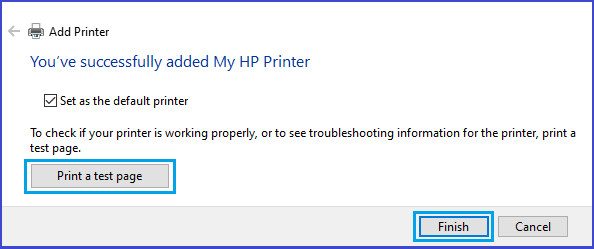
Your Printer is now properly setup and it should come up in the list pf printers, when you try to print any document on your computer.