As you must have learnt the hard way, entering incorrect password multiple times can get you locked out of iPhone. You can find below the steps to gain access to a Locked iPhone.

Locked Out of iPhone or iPad
If you get permanently locked out of iPhone, the only way to gain access to your Locked iPhone is to remove its Lock Screen Password by erasing all the data on your device.
You will be able to recover data, only if a backup of iPhone is available on iCloud or you had previously downloaded a backup of iPhone to your Mac or Windows computer.
If a Backup is not available, you will have to setup your device As a New iPhone and start from scratch.
With this understanding, let us go ahead and take a look at two different methods to unlock a disabled iPhone.
1. Unlock Disabled iPhone Using Find My iPhone
Perhaps the easiest way to Erase Data on iPhone (including its Passcode) is to make use of Erase Data option, as available in Apple’s Find iPhone service.
If Find iPhone feature is enabled on your device, you can follow the steps below to unlock disabled iPhone.
1. On your Mac or PC, go to icloud.com and sign-in to your iCloud Account by entering your Apple ID and Passcode.
2. Once you are in iCloud, click on Find iPhone icon.
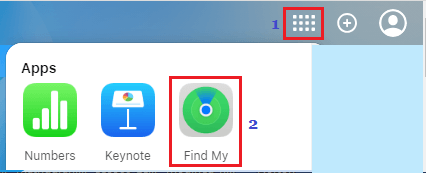
3. If prompted, enter your Apple ID Password to Sign-in to ‘Find iPhone’ service.
4. On the next screen, click on All Devices option (top middle of screen) and select the iPhone that you want to Erase.
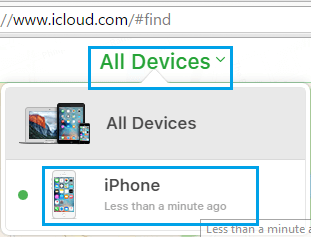
5. Next, click on Erase iPhone option to Erase all the data on your iPhone, including its Lock Screen Passcode that is preventing you from logging in.
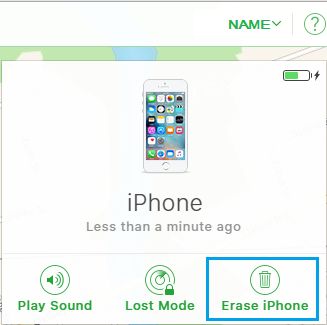
6. If prompted, enter your Apple ID password to Confirm that you do want to Erase all the Data on your iPhone.
7. After the Data is Erased, you will find your iPhone starting with Hello Screen, prompting you to Setup iPhone.
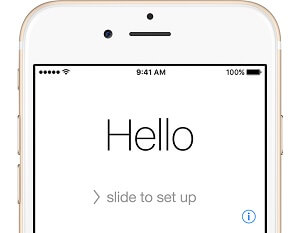
8. Follow the onscreen instructions, until you reach ‘Apps & Data’ Screen. Select Restore from iCloud Backup (if backup is available) or select Set Up as New iPhone (if no backup is available).
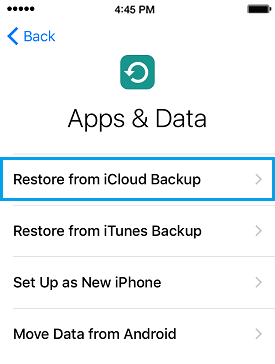
Note: You cal also select Restore from iTunes Backup option, if a backup of iPhone is available on your computer.
9. Wait for the Restore Process to be completed.
Once the Restore Process is completed, you will be able to gain access to your Locked iPhone, without entering the Lock Screen Passcode.
2. Unlock Disabled iPhone Using Recovery Mode
If you have never made a backup of iPhone to computer, the only way to gain access to Locked iPhone is to use Recovery Mode.
The steps to enter Recovery Mode on iPhone vary, depending on the model of your iPhone.
1. Power OFF iPhone
The first step is to completely Power OFF iPhone by following steps as applicable for the model of your iPhone.
iPhone X or later, iPhone 8/8 Plus: Press and hold the Side button and Volume Up or Volume Down button, until you see Slide to Power OFF screen. Drag the Slider to turn off your iPhone.

iPhone 7/7 Plus: Press and Hold the Side button (or top button), until Slide to Power OFF screen appears. Drag the Slider to turn off your iPhone.
iPhone 6S and earlier: Press and Hold the Side button (or top button), until you see Slide to Power OFF screen. Drag the Slider to turn off your iPhone.
2. Force Recovery Mode
The next step is to enter Recovery Mode on iPhone by following steps as applicable for your model of iPhone.
iPhone X or later, iPhone 8/8 Plus: Connect iPhone to computer while holding down the Side button. Keep Holding the Side button, until you see the recovery screen.
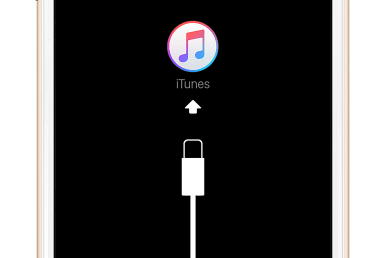
iPhone 7/7 Plus: Connect iPhone to computer while holding down Volume down button. Keep Holding the Volume down button, until you see the recovery screen.
iPhone 6S and earlier: Connect iPhone to computer while holding down Home button. Keep Holding the Home Button, until you see the iTunes Recovery Mode screen.
3. Restore iPhone Using iTunes
Once iPhone enters Recovery Mode, you will see an iTunes pop-up on the screen of your computer. Click on the Restore option.
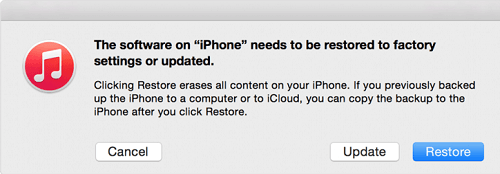
Wait for iTunes to complete the Restore process by downloading the latest version of iOS software and other required files on your device.
Note: Your device may exit recovery mode in case iTunes takes more than 15 minutes to download the Software. In such a case, repeat the above steps to get back to recovery mode.
4. Setup iPhone as New or Using Backup
Once the Restore process is completed, you will see your iPhone starting with ‘Hello Screen’.

Follow the On-screen instructions, until you reach Apps and Data screen, providing you with different options to Restore your Locked iPhone.
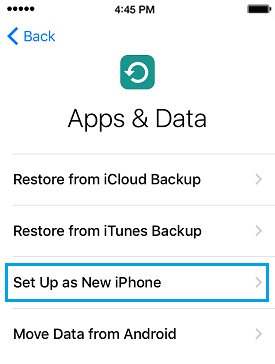
If an iCloud Backup is available, select Restore From iCloud Backup. If a backup of iPhone is available on your computer, select Restore From iTunes Backup option.
If you do not have an iCloud Backup, tap on Set Up as New iPhone option and complete the Set up Process.
After your device is setup, you will be able to gain access to your Locked iPhone, without entering any Password.