If your iPhone is coming up with “Face ID has been disabled” error message, you won’t be able to unlock your device using Face ID and use Face ID to download Apps and make purchases on the App Store.
Unless your device has suffered from water damage or suffered physical damage to any of its hardware components due to a fall or impact, the problem of Face ID not working on iPhone is mostly software related and it can be fixed.
Face ID Has Been Disabled on iPhone
If your iPhone is coming up with “Face ID has been disabled” error message, you can find below the steps to fix the problem of Face ID Not working or Disabled on iPhone.
1. Check Front Camera
Make sure that the front facing camera is not being blocked, obstructed or covered by the Phone Case/Cover that you might be using to protect your device.
If you have recently applied or changed the screen protector, make sure that it is not obstructing the sensors. Also, make sure that the camera is not being blocked in any way by a speck of dust or grime.
2. Restart iPhone
The problem could simply be due to a stuck program or process interfering with proper functioning of Face ID.
Shut down your device by using the power button or by going to Settings > General > Shut Down.
Wait for 30 seconds > Restart iPhone and see if the Face ID is now working properly on your iPhone.
3. Switch Face ID OFF/ON
Enabling and Disabling Face ID can help in fixing minor glitches.
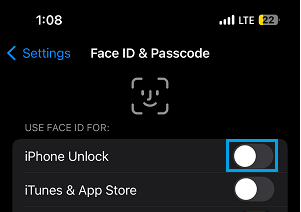
1. Go to Settings > Face ID & Passcode > Use Face ID.
2. On the next screen, disable iPhone Unlock option.

3. Wait for 30 seconds > Enable Face ID back on your device by moving iPhone Unlock slider to ON position.
4. Reset Face ID on iPhone
Sometimes, the problem is due to Face ID settings or Face ID data stored on your device becoming corrupted or damaged.
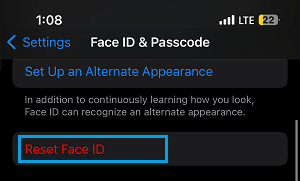
1. Go to Settings > Face ID & Password.
2. On the next screen, scroll down and tap on Reset Face ID.

3. After this, follow the on-screen instructions to register your face again.
6. Update iPhone
Sometimes, the problem is due to bugs in Apps or the operating system, for which Apple and the developers release updates. Hence, make sure that your iPhone is up to date with the latest updates.
1. Go to Settings > General > Software Update.
2. Wait for iPhone to check for updates > tap on Install (if an update is available).
7. Reset All Settings
The problem could be due to change or corruption of settings on your device. Hence, follow the steps below to Reset All Settings on your iPhone.
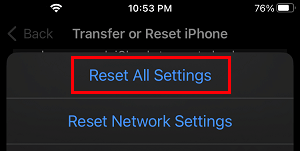
1. Go to Settings > General > Transfer or Reset iPhone > Reset.
2. On the next screen, select Reset All Settings option.

3. Patiently wait for the Reset process to be completed.
8. Perform DFU Mode Restore
If above methods did not help, you can try DFU Mode Restore, which erases everything from your device, including the corrupted software or firmware causing the problem on your device.
After erasing iPhone, DFU Mode installs the latest versions of operating system and the required firmware on your device.