Most Android Phones come with a built-in spell checker, in addition to the autocorrect feature. In case you haven’t used it, you can find below the steps to Enable Checker on Android Phone.
As it is obvious from the name, enabling the Spell Checker on an Android Phone or Tablet allows you to check spellings and this tool can be used with and without the Autocorrect feature.
The advantage of using Spell Checker is that it highlights misspelled words and allows you to correct them, unlike the auto-correct feature which automatically tries to replace the misspelled words.
As you must have already experienced, the corrections made by the Autocorrect feature on Android Phone are not always right and this can be quite annoying.
Enable Spell Checker On Android Phone
The Spell Checker is available on most Android phones, but depending on the manufacturer it may be located in a different place and may have a different name.
On stock Android phones, it is known as “Spell Checker,” while on Samsung Android Phone it is known as “Spelling Correction.”
Follow the steps below to enable Spell Checker on your Android Phone or Tablet.
1. Open Settings on your Android phone or Tablet.
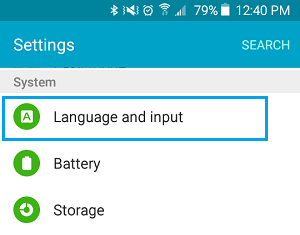
2. On the Settings screen, scroll down and tap on Language and Input option located under “System” section.

Note: On some devices, Languages & Input might be located under Additional Settings or General Management.
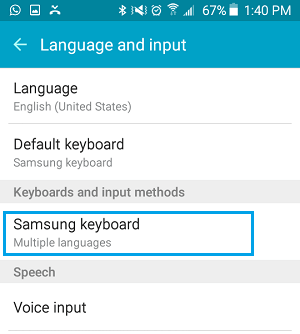
3. On Languages and Input screen, select your keyboard located under “Keyboards and input methods.” section.

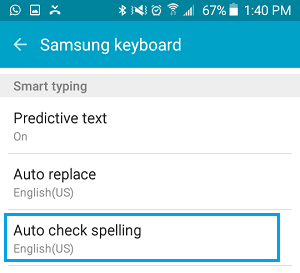
4. On the Keyboard screen, tap on “Spell Checker” or Auto Check Spelling in the case of Samsung Galaxy devices.

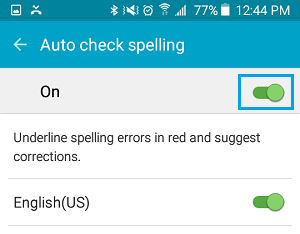
5. On the next screen, toggle ON the option for Spell Checking.

Once Spell Checking is enabled, you will see a list of suggested replacement words.