Similar to Google Chrome, Microsoft Edge and other web browsers, the Firefox web browser also provides the option to both Enable and Disable Cookies.
In general, most users find the need to Enable Cookies when they are unable to access certain webpages and the website prompts them enable cookies.
If you are thinking in terms of disabling cookies in Firefox, you need to be aware that disabling cookies can prevent you from accessing the full functionality of certain websites and may even prevent you from accessing certain webpages.
1. Enable Cookies in Firefox
If you are unable to access certain pages or parts of a website, it is likely that the problem is due to cookies being blocked in the Firefox browser installed on your computer.
In such cases, you can follow the steps below to Enable Cookies in the Firefox browser installed on your computer.
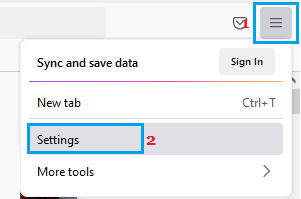
1. Open Firefox Web Browser on your Computer > click on 3-bar Icon and select Settings in the drop-down menu.

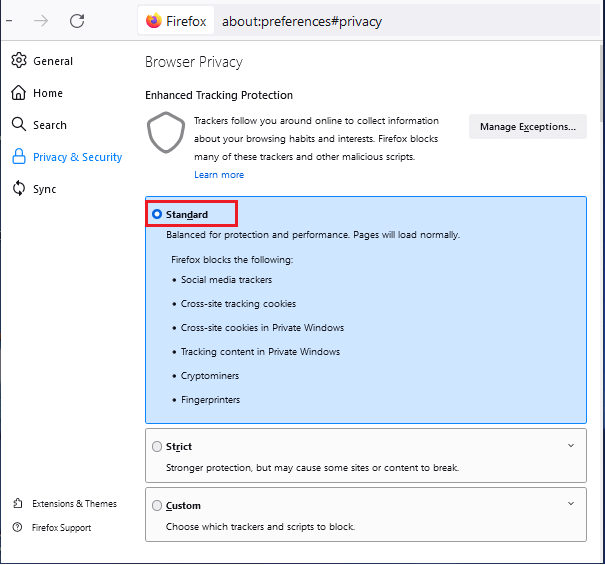
2. On the next screen, select Privacy & Security option in the left-pane. In the right-pane, select Standard option under “Enhanced Tracking Protection” section.

When you select the Standard option, Firefox will enable all cookies that are required for proper functioning of websites on your computer, while blocking Cross-site tracking cookies, Social media trackers, Cryptominers and Fingerprinters.
2. Disable Cookies in Firefox
At any time, you can disable All Cookies or specific types of cookies in Firefox by following the below steps.
1. Open Firefox Web Browser on your computer > click on 3-bar Icon and select Settings in the drop-down menu.

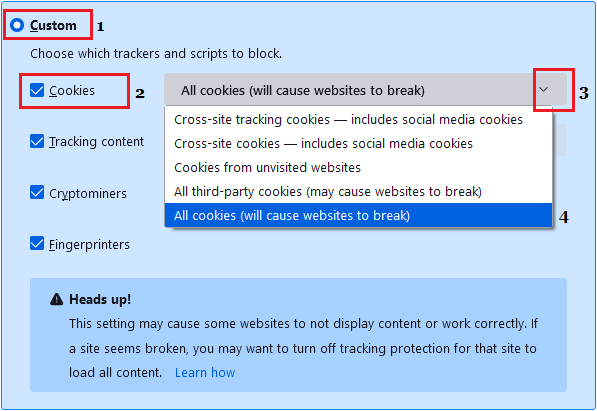
2. On the next screen, select Privacy & Security option in the left-pane. In the right-pane, select the Custom option and select the type of Cookies that you want to block on your computer.

As you can see in above image, the Custom option in Firefox allows you to block All Cookies, All Third-Party Cookies, Cross-site tracking cookies and Cookies from unvisited websites.