If your computer is coming up with “Display Driver stopped responding and has recovered” message, the problem could simply be due too many apps being left open or running in background and also due to corrupted device drivers, overloading/overheating of the GPU.
In a typical case, the computer slows down or hangs and its screen may go off and come back again, followed by “Display Driver stopped responding and has recovered” error message in the notification area.
This problem occurs when the Time Detection and Recovery (TDR) feature in Windows OS determines that the GPU (Graphics Processing Unit) has not responded within the permitted time and restarts the Display Drivers.
Display Driver Stopped Responding and Has Recovered
If you are frequently noticing “Display Driver stopped responding and has recovered” error message on your computer, you should be able to fix the problem using the following steps.
1. Close Unnecessary Programs
Having multiple programs, browser tabs and email messages open at the same time can strain the GPU and lead to performance issues.
Close all the unnecessary programs and browser tabs and see if this improves the performance of your computer.
2. Update Graphic Driver
Follow the steps below to update the Graphics Driver on your computer.
1. Right-click on the Start button and click on Device Manager.
2. On Device Manager screen, expand the entry for Display Adapters > right-click on the Graphics Driver and click on Update driver.
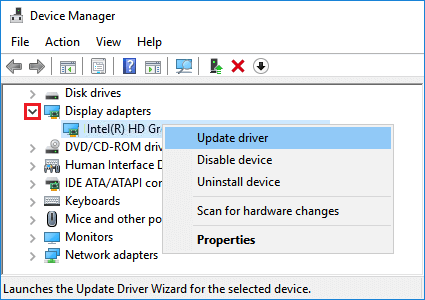
3. After updating Graphics Driver, restart your computer and see if the problem is now fixed.
3. Adjust Visual Effects for Best Performance
Follow the steps below to set the Visual Effects on your computer for best performance.
1. Right-click on Start and click on Run.
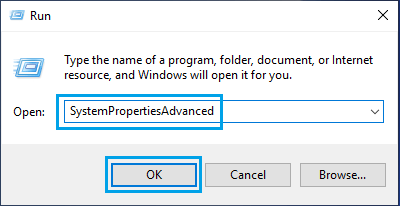
2. In Run command window, type SystemPropertiesAdvanced and click on OK.
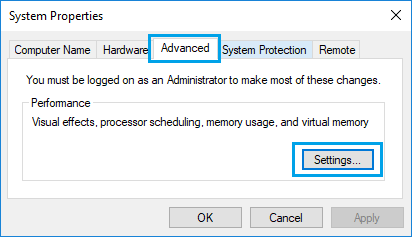
3. On the next screen, switch to Advanced tab > click on the Settings button located under “Performance” section.
4. On the Performance Options screen, switch to Visual Effects tab and select Adjust for best performance option.
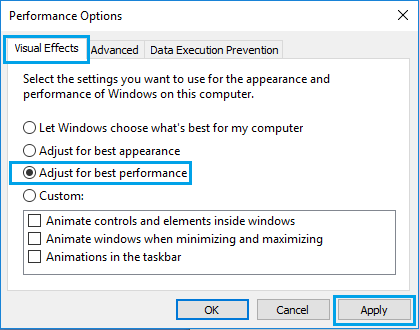
5. Click on Apply > OK to save these settings on your computer
4. Increase GPU Processing Time Using Registry Editor
If you are unable to fix the problem using above methods, you can try to increase the GPU Processing time on your computer and see if this helps in fixing the problem.
Note: This step is meant for advanced users, proceed carefully and do not make any mistakes while you are in the registry.
1. Right-click on the Start button and click on Run.
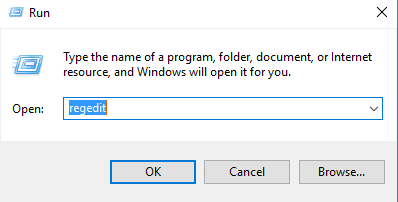
2. In Run Command window, type regedit and click on OK.
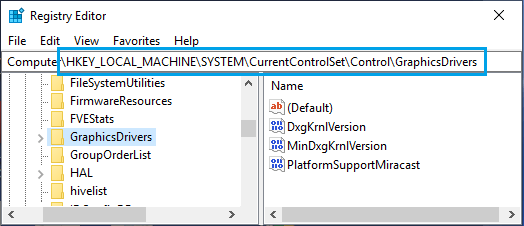
3. On the Registry Editor screen, navigate to HKEY_LOCAL_MACHINE\SYSTEM\CurrentControlSet\Control\GraphicsDrivers
4. Click on GraphicsDrivers folder in the left pane. In the right-pane, create a new DWORD by right-click in any Blank space > New > DWORD (32-bit) Value.
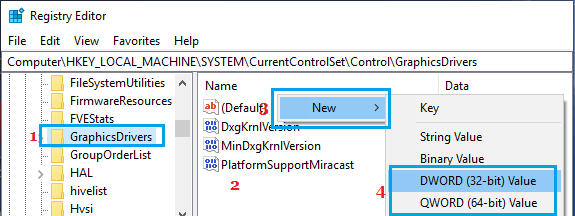
Note: You can choose DWORD(64-bit) if the OS on your computer is 64-bit
5. Name the newly created DWORD as TdrDelay > Double-click on TdrDelay and type 8 as the “Value Data” in Edit DWORD pop-up.
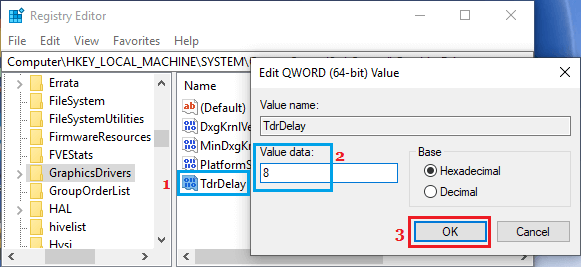
6. Click on OK to save this change to the Registry.
Close the Registry Editor and restart the computer for this change to Apply.
5. Clean the Graphics Card
The performance of the Graphics Card on a Windows computer can substantially degrade if it is heating up due to poor ventilation or other problems.
In general, drivers are known to crash if the computer heats up above 80 degrees centigrade.
To fix this issue, you will have to shut down the computer, open it up and clean its Fan, Heat Sinks and the GPU using compressed air.