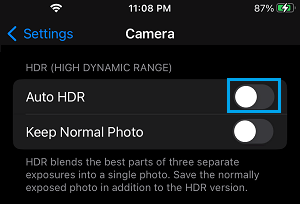
If the HDR Button is missing, you won’t be able to manually enable or disable HDR from within the Camera App on your iPhone. Fortunately, it is really easy to get back the missing HDR button on iPhone.
In case of most new iPhones, the issue of HDR button missing or not appearing on iPhone Camera is due to Auto-HDR being enabled by default in the latest models of iPhone.
Disable HDR Option Missing on iPhone Camera
All that is required to fix the issue of HDR Button missing on iPhone Camera is to disable Auto-HDR and this will automatically bring back the missing HDR button on iPhone Camera.
Adding back the missing HDR button allows you to manually enable or disable HDR from within the Camera App, depending on whether or not you want to shoot pictures in HDR mode.
1. Steps to Add HDR Button to iPhone Camera App
Follow the steps below to fix the issue of HDR Button missing or not being available on iPhone Camera app.
1. Open Settings > scroll down and tap on Camera.
2. On the Camera screen, scroll down to “High Dynamic Range” section and move the toggle next to Auto HDR to OFF position.

3. After disabling Auto HDR, open the Camera App and should be able to see the missing HDR button back at the top of the camera screen.
![]()
Once the HDR button is available, you will be able enable or disable HDR manually on your device by tapping on the HDR button.
Another advantage of Enabling the HDR button on iPhone Camera is that you can still set the HDR button to Auto from within the Camera App and switch OFF the Auto option at any time.
Note: As mentioned above, this fix only applies to newer models of iPhone (iPhone 8 and above). The previous Models of iPhone should not have this problem, as auto HDR is not enabled by default on these iPhone models.
2. Does HDR Create Better Pictures?
In theory, HDR (High Dynamic Range) should be able to create better looking pictures as it is basically meant to create a single picture (a better one) by combining color ranges from multiple exposures.
However, in practice this does not always translate into better looking pictures. In certain lighting conditions and certain cases, HDR can end up making pictures look bad, compared to regular photos.
It is only with practice and by taking a lot of pictures that you can get better at when to use HDR and when not to use it.
3. Enable Keep Normal Photo Option on iPhone
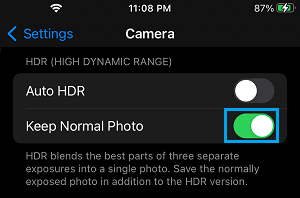
Another option that you can try is to enable Keep Normal Photo option on your iPhone. This allows iPhone to keep the normally exposed photos in addition to HDR photos.

When this option is enabled, you will be able to take look at both HDR and Non HDR Photos and keep the one that you believe is better. In-fact, you will be able to see the Regular and HDR image of the same shot side-by-side, which makes it easy to compare the two images.
The disadvantage of enabling “Keep Original Photo” option is that you will basically end up with two sets of photos, and you will have to manually go through the procedure of comparing and deleting unwanted photos from iPhone.