You may find the need to disable the Firewall on your Windows computer, if a legitimate app or desktop program is being blocked by the Firewall.
Before going ahead with the steps to disable the Firewall, it is strongly recommended that you should think in terms disabling the firewall, only if it is blocking a legitimate app or desktop program on your computer.
Once the purpose of disabling the firewall or the troubleshooting process is completed, you should always remember to re-enable the Firewall back on your computer.
Note: If you are using a third-party antivirus program, the Firewall on your computer will be managed by the third-party antivirus program.
How to Turn Off Firewall in Windows 10/11
In both Windows 11/10, you can disable the Firewall on your computer by using the built-in Windows Security Program.
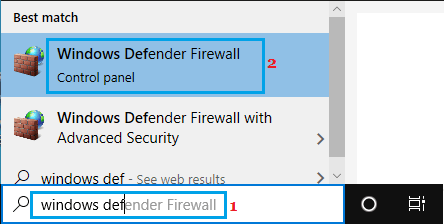
1. Type Windows Defender in the search bar and click on Windows Defender Firewall in the search results.

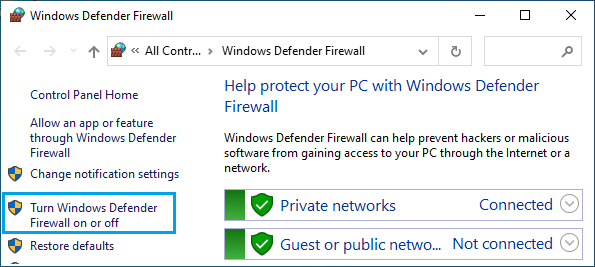
2. On the next screen, click on Turn Windows Defender Firewall on or off option.

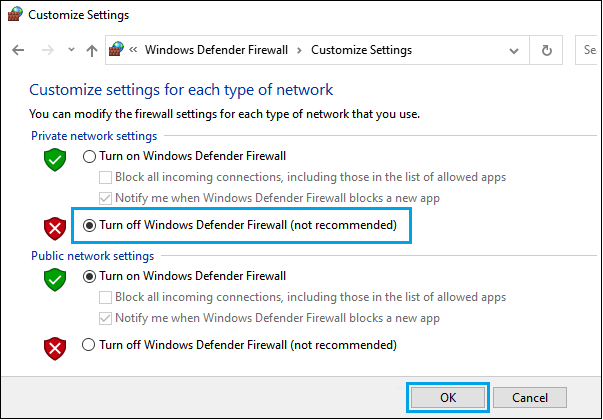
3. On Customize Settings screen, you can disable Firewall for both Private and Public Networks by selecting Turn OFF Windows Firewall (not recommended) option and clicking on OK.

Note: After the troubleshooting process is completed, make sure that you remember to Enable or Turn ON the Firewall. This ensures that your computer remains protected from malware and unauthorized access.