The Start menu search on Windows computers is powered by Microsoft’s Bing search engine, which explains the reason for appearnce of results from the internet in start menu search results.
As you may agree, Bing powered search results from the internet are totally unnecessary when the User is only trying to look for a file or program located on the Hard Disk of the computer.
If you do not want to see results from the internet appearing in Windows search, you can find below the steps disable Bing Search in Windows start menu by using registry editor.
Disable Bing Search in Windows 11/10 Using Registry
On both Windows 10 and Windows 11 computers, you can disable Bing Search in Windows start menu by editing the relevant Registry File.
Note: Before editing registry files, it is recommended that you make a backup of registry files on your computer.
1. Right-click on the Start button and click on Run.
2. In the Run Command window, type regedit and click on OK.
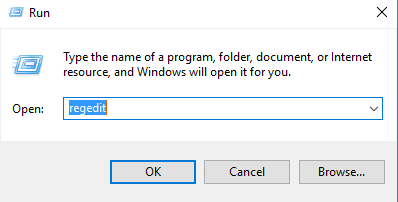
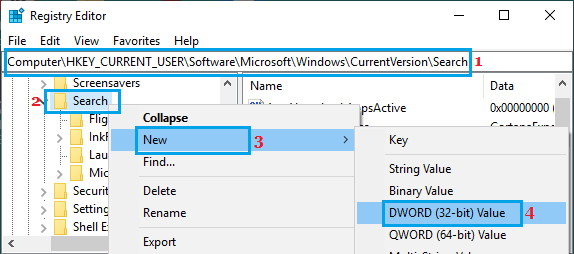
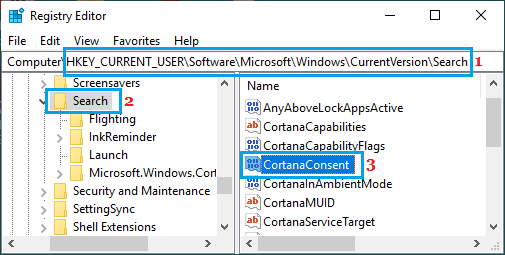
3. On the Registry Editor screen, navigate to HKEY_CURRENT_USER\SOFTWARE\Microsoft\Windows\CurrentVersion\Search.
4. Right-click on the Search Folder and select New > DWORD (32-bit) option in the contextual menu.
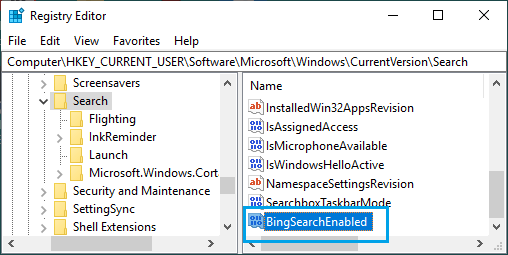
5. Name the newly created DWORD as BingSearchEnabled and double-click on it.
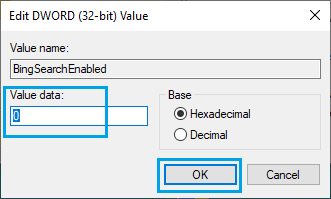
6. On Edit DWORD pop-up, make sure the Value data field is 0 and click on OK.
7. Next, double click on CortanaConsent entry.
8. On Edit DWORD pop-up, type 0 in the Value Data field and click on OK.
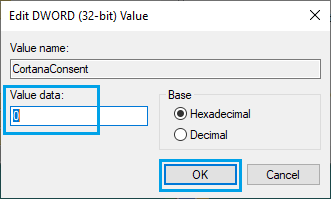
Note: If you do not see CortanaConsent, create this field by following the same steps as used to create BingSearchEnabled.
After this change in registry, you should no longer find Bing bringing up results from the internet, when you use the Start menu search bar on your computer.
In case required, you can always bring back the web search results by opening Registry Editor and changing BingSearchEnabled and CortanaConsent Data Values to 1.