If the Photos App on your iPhone or iPad is littered with unwanted Albums, you can find below the steps to Delete Photo Albums on iPhone and iPad.
Delete Photo Albums on iPhone or iPad
Once a Photo Album is created on iPhone, it will continue to remain on your device, even if all Photos and Videos from the Photo Album are removed.
While Empty Photo Albums do not take up any storage space on iPhone, they can end up cluttering the Photos App on your device with unwanted Photo Albums.
Hence, the need to remove unwanted Albums from the Photos App on your device by deleting Photo Albums that you do not need or unlikely to use in future.
1. Steps to Remove Photo Albums from iPhone
Follow the steps below to remove Empty or Unwanted Photo Albums from iPhone.
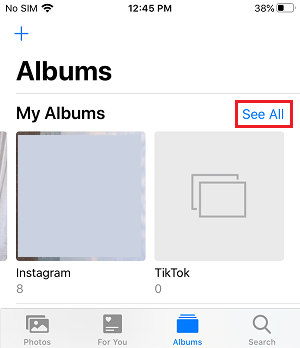
1. Open Photos App > tap on Albums tab in bottom menu and then tap on See All option located at top-right corner.
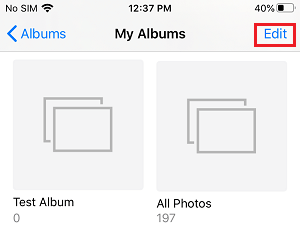
2. On the next screen, tap on the Edit option located at top-right corner.
3. Next, tap on the red minus icon located next to the Album that you want to remove from iPhone.
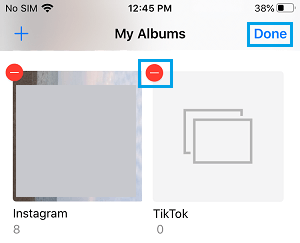
4. On the Confirmation pop-up, tap on the Delete option to confirm.
The selected Photo Album will be immediately removed from your device.
Unable to Delete Photo Albums on iPhone
While Photo Albums created by the users can be easily deleted from iPhone, certain Photo Albums are protected and you won’t be able to delete them.
If you are unable to delete a Photo Album on iPhone, it is likely to be one of the following types of protected Albums.
- Media Type Albums (Videos, Selfies, Screenshots, Panorama)
- Synced Photo Albums from Mac or Windows computer
- Photo Albums Created by iPhone (People, Places)
Apart from above, you should be able delete all other Photo Albums on your iPhone or iPad.
How to Delete Synced Photo Albums on iPhone
If your iPhone is showing Photo Albums from Mac or PC, these are Synced Photo Albums that cannot be deleted from iPhone using above steps.
The only way to remove Synced Photo Albums from iPhone or iPad is by connecting your device to Mac or Windows computer.
1. Connect iPhone to Mac or Windows PC using its supplied lightning cable. If you are on Mac, open Finder and select your iPhone in the side menu.
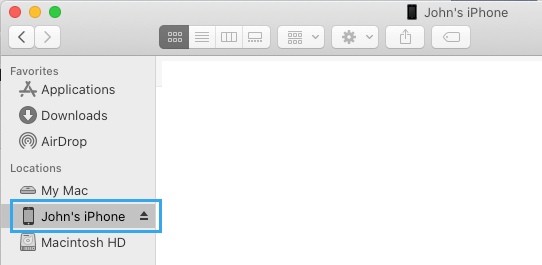
If you are on a Windows computer, open iTunes > click on the Phone icon as it appears in iTunes and then select your iPhone in the side menu.
2. Next, switch to Photos tab, make sure Selected Albums option is checked, Uncheck Photo Albums that you want to remove from iPhone and click on Apply.
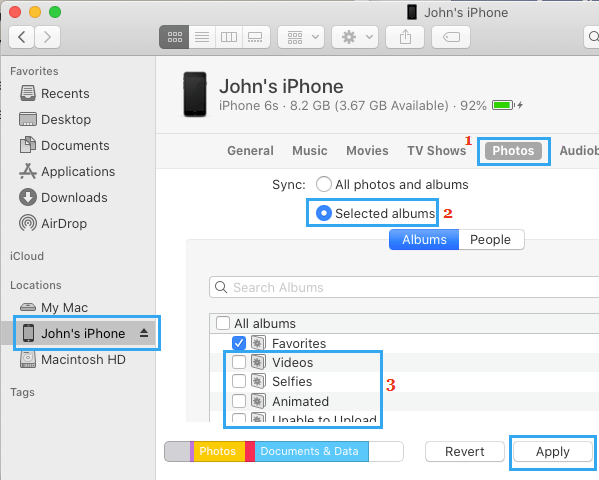
Note: This method only removes Photo Albums Syncing from other devices (iPad, Mac) on your iPhone. It won’t remove Photo Albums that were created on your device.
3. Wait for the changes to Sync with your iPhone.
Once the syncing process is completed, only the selected Photo Albums will remain on your device. All unselected or unchecked Photo Albums will be removed from iPhone.