Having a Reminders List on iPhone can help you plan your day and remain focused on tasks that need to be completed. You will find below the steps to Create Reminders List on iPhone.
Create Reminders List on iPhone
In general, the purpose of creating Reminders Lists on iPhone is to organize and manage Reminders by grouping them into different Categories or Lists.
For example, all the Work related Reminders can be grouped into a single Reminders List and all Reminders of Personal nature can be grouped into another Reminders List.
Also, you can customize Reminders Lists by using different colours, icons and invite other people to share your Reminders List.
1. Create New Reminders List on iPhone
Follow the steps below to create a New Reminders List on iPhone.
1. Open the Reminders App on your iPhone.

2. Tap on Add List option located at bottom-right corner of your screen.
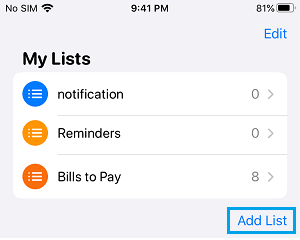
3. On New List screen, type Name of the new list and tap on Done.
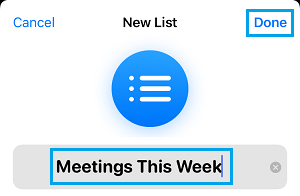
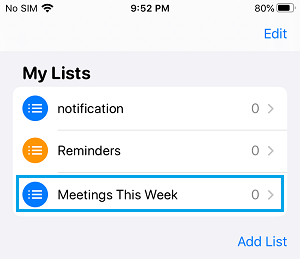
As simple as that, you have just created a blank Reminders List and given it an appropriate name.
2. Add Items to Reminders List
Now that you have created a Reminders List, you can add items to your list.
1. Open the Reminders List to which you want to Add Items.
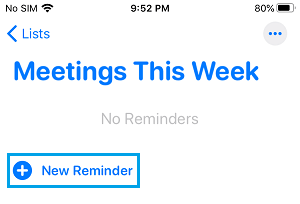
2. On the List screen, tap on + New Reminder option or tap anywhere within the list.
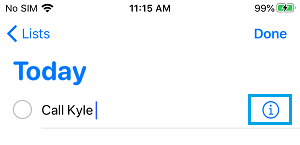
3. On the next screen, type a descriptive Name for the item and tap on the details (i) icon.
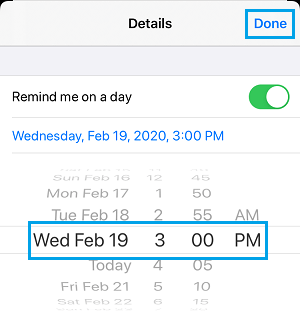
4. On the next screen, enable Remind me on a day and Remind me at a time options and tap on Alarm.

5. From the Alarm drop-down, select Time and Date and tap on Done.
Similarly, you can add more items to this list.
3. Add Location Based Alerts to Reminders List
The Reminders app on your iPhone also allows you to add location based alerts.
Location based alerts or reminders can be set to trigger either when you reach the location or leave from a location.
1. Open the Reminders List to which you want to Add Location based Alerts.

2. On the List screen, tap on + New Reminder option or tap anywhere within the list.

3. On the next screen, type a descriptive Name for the item and tap on the details (i) icon.

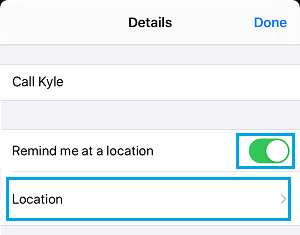
4. On the Details screen, enable Remind me at a Location option and tap on Location.
5. On the next screen, search for the location by typing in the search box > select the Location at which you want the Reminder to trigger on your iPhone.
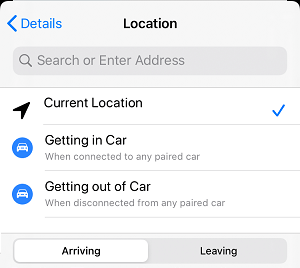
Also, select whether you want the Alert to trigger while Arriving or Leaving your selected Location.
4. Add Contacts to Reminders List
Another useful feature in Reminders App is that it allows you to invite people to your Reminders List.
1. Open the Reminders List to which you want to Add Contact.
2. Once you are in the Reminders List, tap on the 3-dot menu icon located at top-right corner.
![]()
3. From the menu that appears, select the Add people option.
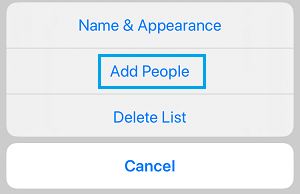
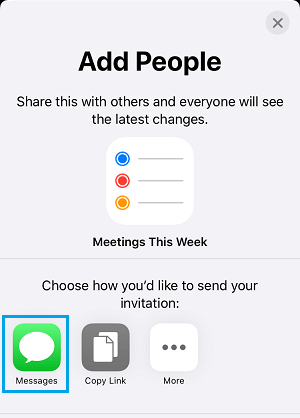
4. On the next screen, select how you would like to send your invitation. In this case, we have selected the Messages App.
5. On the New Message screen, tap on the + icon to access your Contacts List.
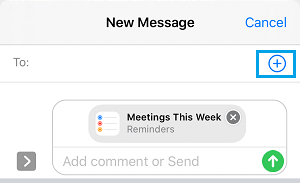
6. On the next screen, select People that you want to invite to your List and send your Message.
The people that Add to the Reminders List will receive an invitation to join the Shared Reminders List.
Once the invitation is accepted, other People will be able to Edit and Add Items to the Reminders List.
Both you and People that you have added to the Reminders List will be receiving time and location based alerts as soon they are triggered by the criteria set for these Alerts.
5. How to Delete Reminders List
If you are done with a Reminders List, you can delete the Reminders List from your iPhone.
1. Open the Reminders List that you want to delete.

2. In the Reminders list, tap on 3-dots menu icon located at top-right corner.
![]()
3. On the pop-up, select the Delete List option.
4. On the confirmation pop-up, tap on Delete to confirm.
Note: If you Delete a Shared Reminders List created by you, the List will be removed from all your devices and also from all Contacts that you had shared the List with.
When you delete a Shared Reminders List that you did not create, the List will only be removed from your device.