Most users have Android Phones with 32 or 64 GB Storage, which can get quickly get filled up. You will find below tips to Clear Storage Space on Android Phone or Tablet.
Clear Storage Space on Android Phone
For the proper functioning of your device, it is necessary that you get into the habit of clearing storage space on your Android Phone or Table.
This can be done by periodically removing unwanted Photos, Videos, Documents and other files from your Android Phone.
1. Delete Unwanted Photos & Videos
Photos and Videos take up a lot of storage space and you can expect to free up a ton of storage space by deleting unwanted Photos from your Android Phone.
1. From the Home screen, navigate to Gallery > Albums > Camera Folder.
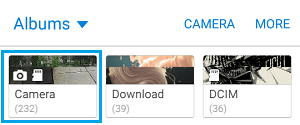
2. In Camera Folder, select and Delete All the Unnecessary Photos and Videos.
2. Delete WhatsApp Photos & Videos
By default, WhatsApp saves all the sent and received photos to the internal device storage of your Android Phone, which often leads to accumulation of tons unwanted WhatsApp Photos and Videos on your device.
1. Open Gallery App > tap on Albums > open WhatsApp Image Folder.
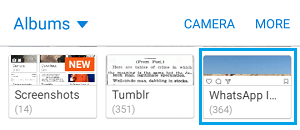
Note: You may find multiple WhatsApp Image Folders.
2. Select and Delete All the Unnecessary Photos and Videos in WhatsApp Image Folder.
In future, you can prevent WhatsApp from downloading Photos and Videos on your Phone by using steps as mentioned in this article: How to Stop WhatsApp From Saving Photos to Android Phone.
3. Delete Rarely Used Apps
We often download Apps that appear interesting, but they end up being not that useful or necessary.
1. Go to Settings > Device Care > Storage > Apps.
2. On the next screen, select Apps that you want to remove and tap on the Delete option.
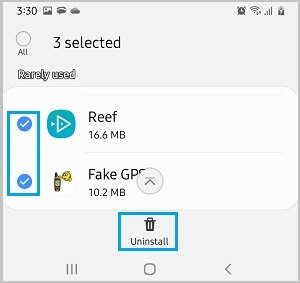
3. On the confirmation pop-up, tap on Uninstall to confirm.
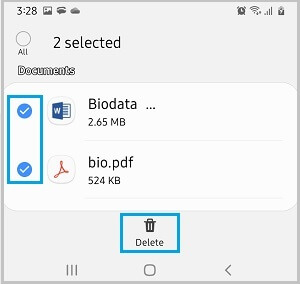
4. Delete Documents
1. Go to Settings > Device Care > Storage > Documents.
2. On the next screen, select Documents that you want to remove and tap on the Delete option.
5. Delete Screen Shots
You may have many screen shots stored on your device that have already served their required purpose and are no longer needed.
1. Open Gallery App > tap on Albums tab in bottom menu and open Screenshots Folder.
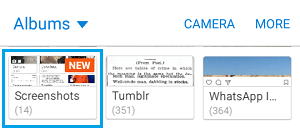
2. Select and Delete All the Screen Shots that you do not need.
6. Delete Temporary Files
These are temporary cached and other files created by the system and no longer necessary for the operation of your device.
1. Go to Settings > Device Care > Storage > Temporary Files.
2. On the next screen, select All and tap on the Delete option.
7. Transfer Photos to Computer
To get even better results, you can transfer all the Photos and Videos from your Phone to computer and then Delete All Photos from your device.
8. Use Smart Storage
Some Android Phones come with Smart Storage feature, which automatically removes backed-up photos, if the storage on your device is getting full.
This feature needs to be toggled ON by going to Settings > Storage and moving the toggle next to Smart Storage to ON position.
Also, you need to select the duration (30, 60 or 90 days) after which Smart Storage can remove backed-up Photos from your device.