Your Windows 10 computer has a name as provided by its manufacturer. However, it is possible to Change Computer Name in Windows 10 to something more personal or easily identifiable.
Change Computer Name in Windows 10
When you buy a New Windows 10 computer it will have a random Alphanumeric name assigned by the manufacturer.
Also, even when you upgrade from Windows 7 or Windows 8 to Windows 10, the original name that you had on the computer will be carried forward.
However, many users want to Rename their Computer to something more personal or identifiable.
Changing the computer name can be helpful in easily identifying the computer when it is connected to a HomeGroup network.
Having an identifiable computer name also helps in managing your devices on Windows Account page.
Also, some users want to Change Computer Name in order to add a personal touch, by choosing a Computer Name that depicts their personality, affiliation or a cause they support.
1. Rename Windows 10 PC Using Settings
Follow the steps below to Change Computer Name using the Settings Menu on your Windows 10 computer.
1. Open Settings > click on the System Icon.
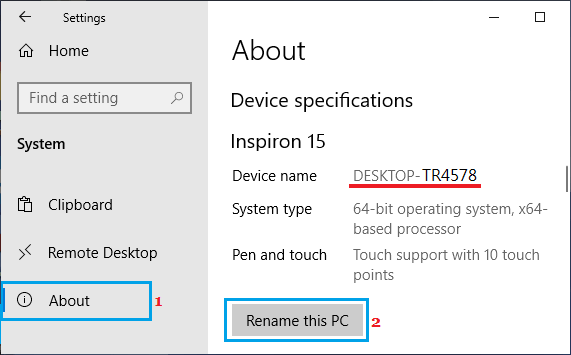
2. On the System screen, scroll down and click on About in the left pane. In the right-pane, click on Rename this PC button located under Device Specifications section.
3. On the next screen, type the New Name of your computer and click on Next.
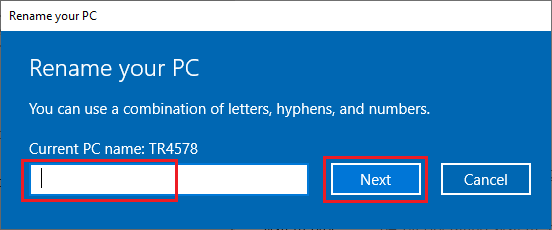
Note: You cannot use blank space and certain special characters while renaming your PC.
4. Restart your computer to save the change to your PC Name.
When your computer restarts, you will be able to see that the Name of your computer has been changed.
2. Rename Windows 10 PC Using Control Panel
It is also possible to Change Computer Name in Windows 10 using Control Panel.
1. Open the Control Panel on your computer.
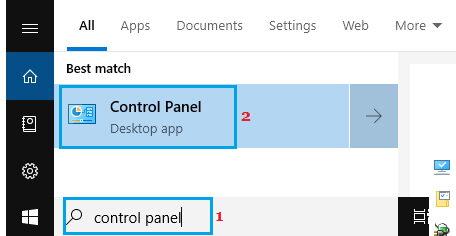
Note: There are multiple ways to Open Control Panel in Windows 10.
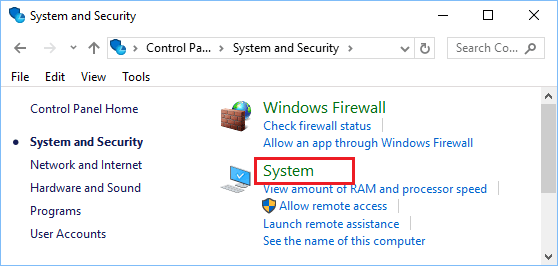
2. On the Control Panel screen, click on System.
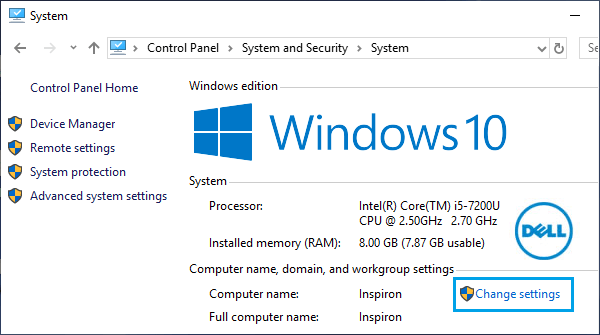
3. On the next screen, click on Change settings option located under “Computer name, domain, and workgroup settings” section.
4. On System Properties screen, click on the Change button.
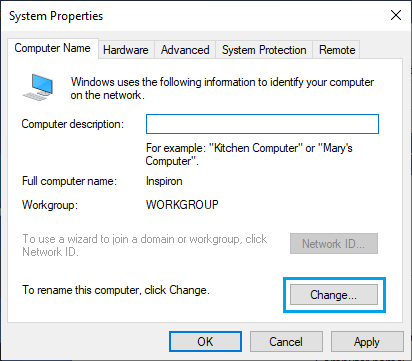
Note: You can also reach this screen by right-clicking on This PC and selecting Properties option in the contextual menu.
5. On the next pop-up, type the new Name for your Computer and click OK.
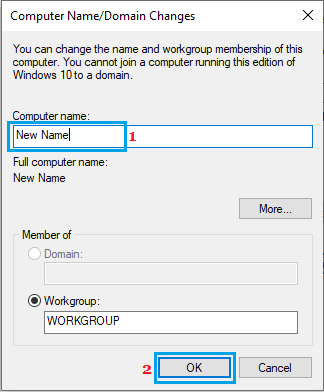
You will need to restart the computer in order to implement this change.